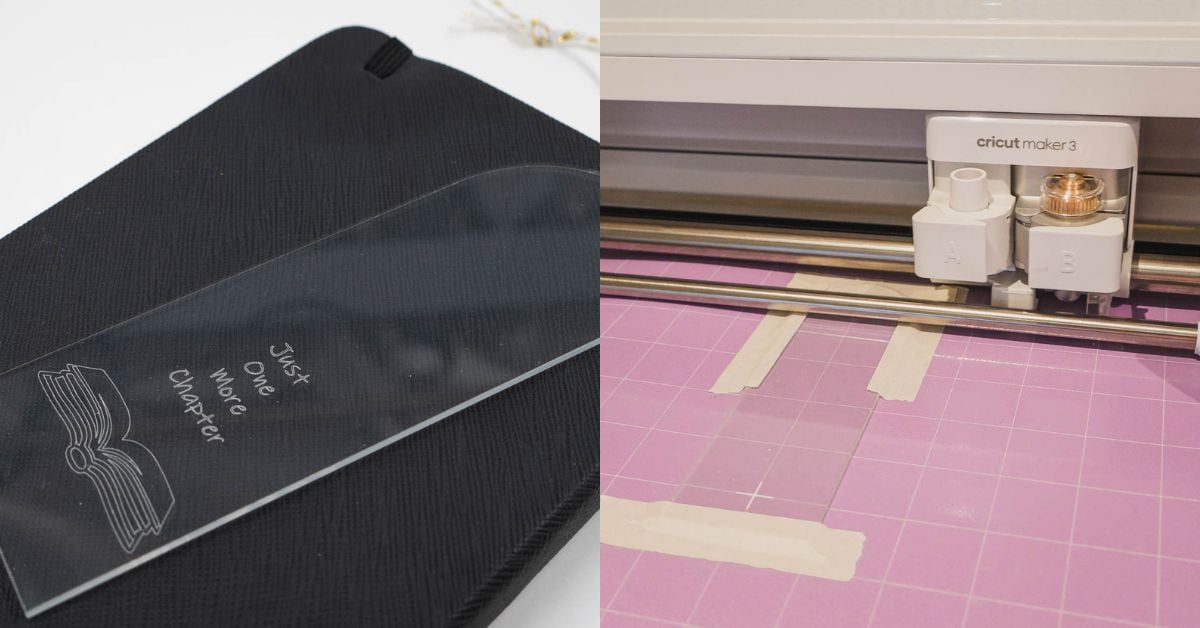
Have you tried to engrave an acrylic bookmark with your Cricut Maker 3? If not, it’s such a fun and easy project that makes great gifts for the readers among your friends and family.
With this tutorial you’ll learn how to engrave a bookmark on a 2 mm thick acrylic bookmark with a free reader SVG file.
We also have 3 extra book lover files available if you’d like to expand your collection.
Let’s get started with this easy step by step tutorial.
Download the Free Book Lover SVG File
You can find this file in my free craft file library. The file number is C8.
Buy the Book Lover SVG Bundle
Get the bundle with 4 book lover SVG files below and you’ll be able to engrave 4 different acrylic bookmarks.
Save on Pinterest!


How to Engrave an Acrylic Bookmark


Materials
Instructions
Prepare file & customize settings in Cricut Design Space
- Download the file(s) from our resource library or our shop and upload to Design Space.

- Measure your bookmark to decide what size to make your file.

- Resize the file according to the size of your bookmark.

- Change the operation to "Engrave".

- Select the file in the layers panel and click "Attach" in the lower right corner.

- Click "Make" in the top right corner.

- Place the book graphic on the middle of the mat. Use the mouse to move it, but to do the final adjustments you can use the arrow buttons on your keyboard.

- Turn on your Cricut machine and click continue. Wait for it to connect.


Get the bookmark Ready & Engrave on Your Cricut
- Remove the protected layer on one side of the bookmark.
- Place the bookmark in the center of a Strong Grip mat, with the side that you removed the protected layer facing upwards. Remember to adjust for any hole for a string on your bookmark.

- Use painters tape to secure the bookmark to the mat.
- Select the material by clicking "Browse All Materials" and choosing "Acrylic, Thick (2 mm)". If you use a thinner bookmark, you may chose "1 mm".

- Move the white star wheels on the roller bar to the right.
- Change to the engrave tip in Clamp B.
- Load the mat and press the load button on the Cricut machine.
- Press Go and let the Cricut engrave your bookmark.
- Then click the unload button on the Cricut and done on your computer.
- Pick up one of the painters tape pieces and tap it multiple times the bookmark to remove any debris.
- Remove the rest of the painters tape and remove the bookmark from the mat.
- Remove the protected layer from the other side of the bookmark.
- Attach a twine to the bookmark & it's finished.


You've Now Learned To Engrave an Acrylic Bookmark
I hope you enjoyed this detailed step by step tutorial showing you how to use your Cricut Maker 3 to engrave with the engraving tip.
It's such a fun and easy Cricut project, that you can easily impress friends and family with.
Happy Crafting!
